Overview: How to export Offline Exchange Database to Office 365? Also, learn the most efficient solution for performing a migration from locally stored EDB files to Office 365 mailbox.
Did you know that Microsoft Exchange and Office 365 are the two most prominent technologies? The Exchange server is a widely used mail server that contains all items, i.e., emails, contacts, calendars, etc. However, at times, Exchange users may face errors like damaged or corrupt EDB files, which leads to users being unable to access the emails for work. So to avoid these corruption conditions, Microsoft launched Office 365, a cloud facility, with a new and improved Exchange Online. Now, users can access their mailboxes from any place and location with the help of the Internet. Office 365 is a cloud-based technology developed by Microsoft, which makes it a very secure place for data storage.
But what happens to all previous data stored in EDB Format, how can the Exchange Administrator export dismounted EDB file data stored in Office 365 Account? For this situation, we will discuss a solution down below. In this blog, we are going to discuss, how you can use this automated solution to export Exchange mailbox to Office 365.
Also Read: How to Import PST to Shared Mailbox Office 365? Step By Step Solution
An Effortless Way to Export Offline Exchange Database to Office 365
This method involves the usage of an automated solution i.e., SysTools Exchange Recovery Tool, which is purposely designed to export the Dismounted mailbox of the Exchange server to Office 365.
But first, let’s understand why this tool is superior to all other techniques for Exporting Offline Exchange Database to Office 365.
Features of the tool
The tool offers functionality that is unmatched when compared to any other solution. We have listed some of those features here:
- The tool is capable of exporting the data of Public Folders as well as Private Folders.
- The functionality to remove encryption from the Exchange EDB files proves to be a game changer for the users.
- Users can avail of the different filter options based on Date and category.
- The integrity of the data is maintained in the export location.
- The tool can even retrieve data from corrupted and damaged Exchange EDB files safely.
- It supports the export of multiple categories of data items such as Emails, Calendars, Contacts, Tasks, Journals, Notes, and Attachments.
- The tool can export the Exchange EDB file data in multiple file formats such as PST, MBOX, PDF, EML, MSG, HTML, Exchange Server, and Office 365.
Steps to Export Offline Exchange Database to Office 365
To learn how this application works, you can go through the following steps:
Step 1. Search & Select Section: In this Section, a user selects the Dismounted and Offline EDB File. If the user doesn’t know the location of the EDB file then the user can select from two options to search the EDB files.
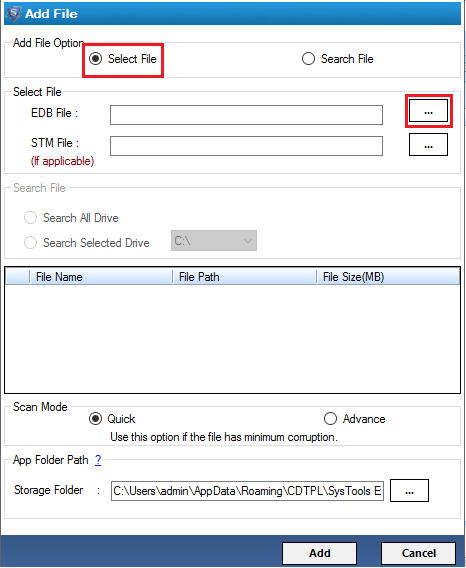
Search All Drives: With this option, you can search for a file from all the Drives.
Search Selected Drive: This option is used to search a file from the selected drive.
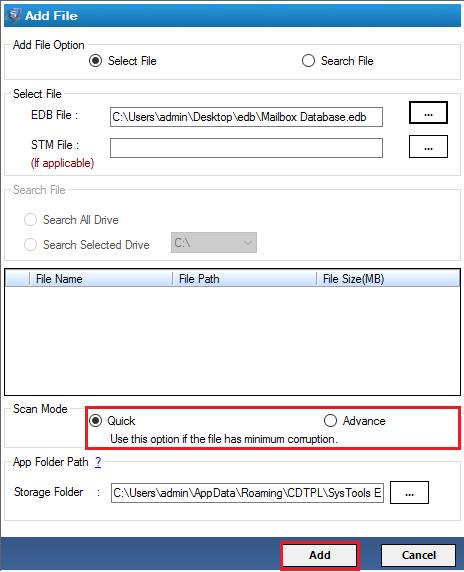
Step 2. Quick & Advance Mode: Once the search process is done, the software will display a list of all EDB files stored on the entire drive. Now, choose the .edb file and add that file for scanning. The software offers two modes, i.e., Quick and Advance for scanning. Next, click on Add to proceed further.
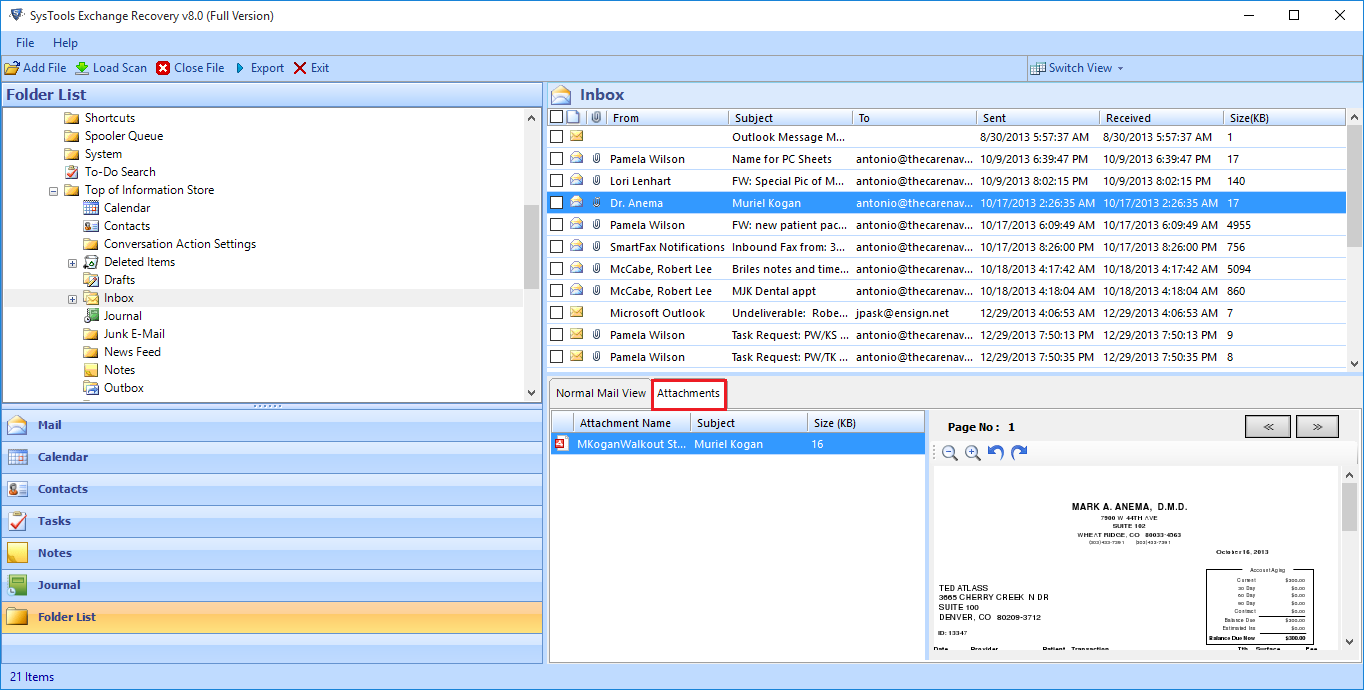
Step 3. Scanning & Preview Exchange Mailbox Details: After Scanning the Desired EDB File, Click on the (+) icon to expand all the mailbox items and choose the specific folder to enumerate a list of emails contained in the selected folder. In the Preview Pane, the Administrator can view all Exchange user mailbox details in a structured manner with different sections like Normal Mail View, Hex Properties, etc.
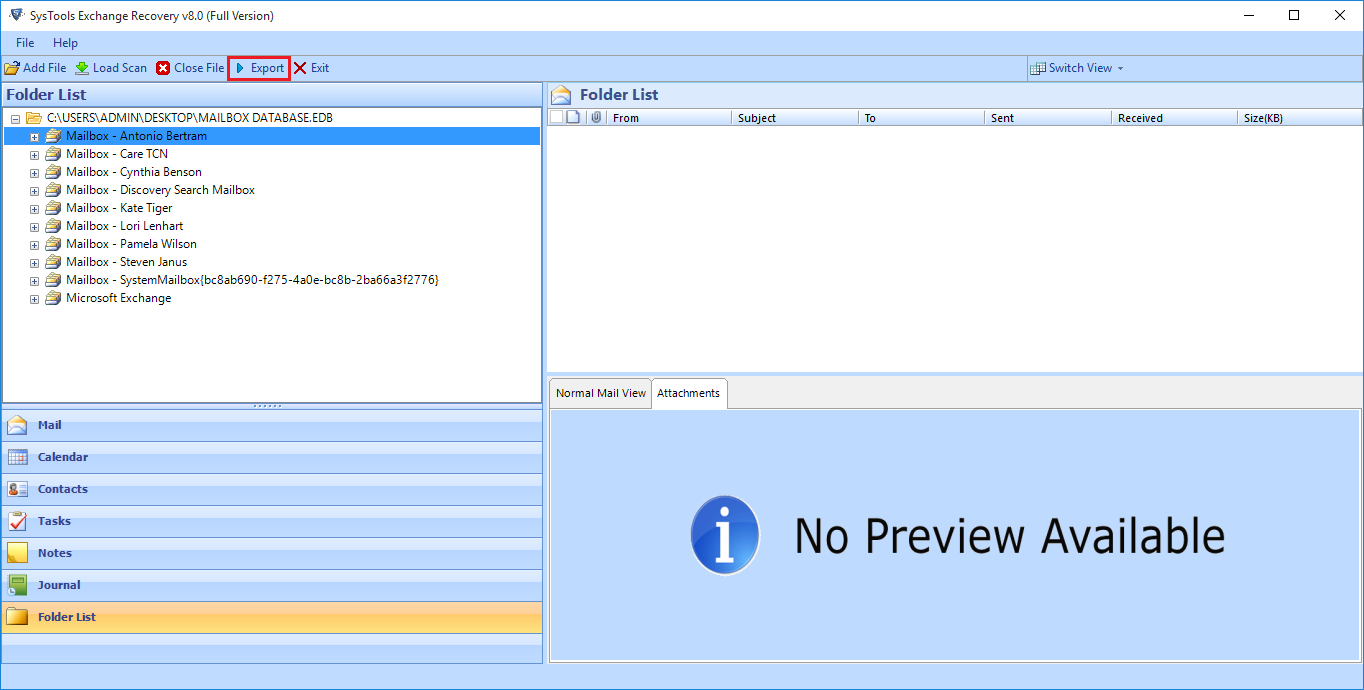
Step 4. Export Offline Mailbox to Office 365: Within Exchange Recovery Software. To move the complete folder, the user needs to select the Export option from the Navigation bar. To transfer selected emails, select each mail and select the Export option.
Admin Impersonation
Step 5. Export Exchange Mailboxes with Impersonation: This Impersonation method to transfer the .edb files, uses Advance Settings and helps the user transfer data to multiple mailboxes.
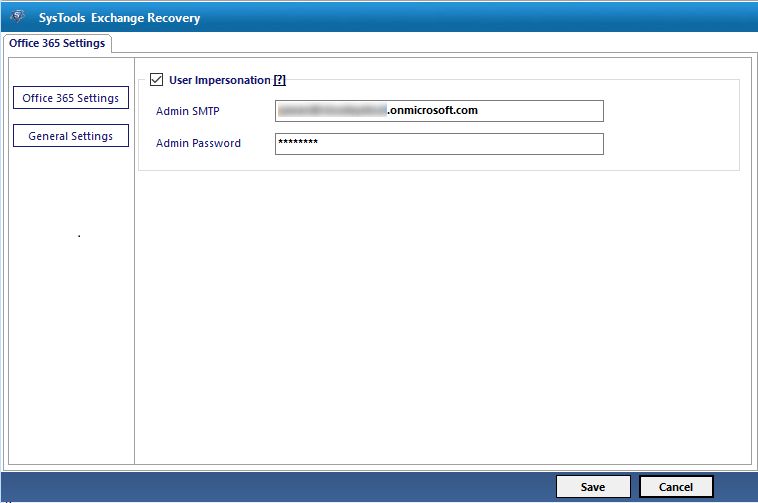
Step 6. Date-Based Filter: The Date-Range filter can be used to filter emails based on a date and to retrieve mailbox items from a certain period. Even Category Filter allows selecting the desired mailbox items like Mails, Contacts, Calendars, Tasks, Journals, and Notes.

Note: With this method, the user does not need to provide credentials for each user.
Step 7. Move Exchange Mailboxes to O365 without Impersonation Technique: This method does not require administrator credentials the user needs to provide mailbox details manually or the user can create a CSV file that holds all User IDs and Passwords of the accounts.

Step 8. When all the data is validated. Click on the Export button. When Exchange to Office 365 migration is finished, the software displays a dialog box. This box states that the export process has been completed.
Also Read: Learn How to Enable Online Archive Office 365 with Step By Step Guide
Conclusion
A simple and easy way to Export Offline Exchange Database to Office 365 is described in this blog. Users can rely on the provided solution because it is recommended by technical experts from all around the world. It seems quite difficult to attempt this export process manually. However, when it comes to executing this process with the help of the aforementioned tool it becomes much easier and safer. Hence, one can accomplish data migration safely and securely without facing any difficulty.


