Office 365 Calendar Permissions Not Updating – Problem Resolved

Can’t figure out why your Office 365 calendar permissions are not updating despite many tries? Not to worry. Being the topmost email client and having a large number of clients and users who rely on Outlook and Office 365. Some of them have a favorite version and won’t leave it even when the official support from Microsoft stops.
So if you are someone using the shared calendars features in Outlook 2016, then you may find that not all appointments show up in the calendar. Maybe they appear briefly and then start to disappear, and eventually the feature itself greys out. It can lead to data loss and prevent you from using Office 365 calendar to its full potential.
The main reason why you face this problem is because of something called cache mode. It is a common error among users who still run Outlook 2016 cache either with their on-premises Exchange or cloud-based Office 365. Let us take a deeper look at this issue.
Office 365 Calendar Permissions Not Working: Explained
Many features of Office 365 enable us to access Outlook on the web, and access to cloud-hosted server versions provides a more secure Office application service. In Office 365, calendar folders are easily shareable with others. In other words, the admin shares calendars with its users.
The Office 365 calendar permissions not updating problem comes when the user gets a cached mode-on with Exchange or Office 365. This means the data from the Office 365 calendar gets saved to the memory of your system, which doesn’t update rapidly.
Sometimes, even after clearing the cache, the user gets the same problem of Office 365 calendar permissions not working in Outlook. After this issue, users can’t get the idea that Office 365 calendars are being shared or that all new events are being added.
Reset If Outlook Calendar Permissions Not Working as Expected
Here are the instructions for setting the various kinds of permissions available in Office 365.
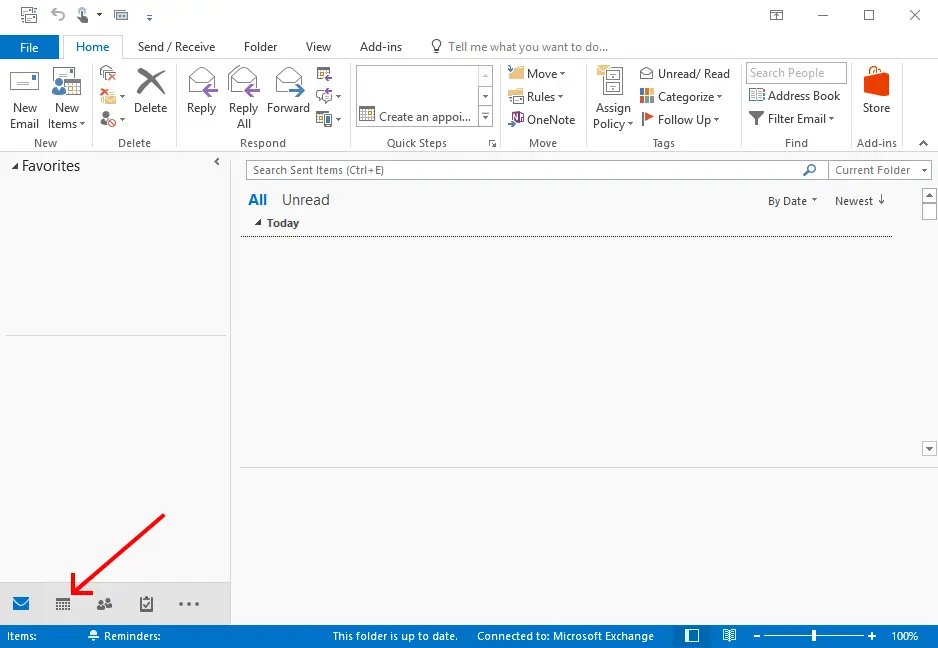
- Press the Calendar Icon preset at the bottom left corner of your screen.
- On the left-hand side pane, Right-click on the calendar for sharing, then hit Properties.

- Go to the Permissions tab
- First, hit Add to assign permissions for a new user, or click the name of the existing user in the list to change their current permissions.
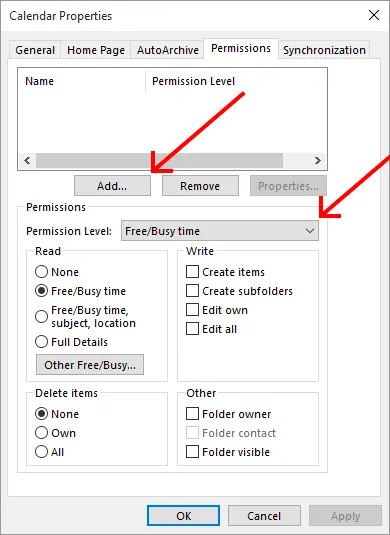
- Either select a predefined set of permissions from the Permissions Level pull-down or specify the permission in the checkboxes below. Common options are:
Free/Busy Time Users who are assigned this permission can only look at whether the time slots are marked as “Free” or “Busy” on the calendar. Whereas, no other specific details are visible to them. Reviewer They have the ability to see all the details, but can’t add, subtract, or change the events in any shape or form. Author This goes one level up from the reviewer, where the additional ability to create new events is also unlocked. However, users still can’t make changes to the events they did not create. Editor Users with this level have access to all calendar details; they can generate new events and modify or remove existing events as well whether made or not made by them.
Challenges with Outlook Shared Calendar Permissions
Encountering difficulties with Outlook shared calendar permissions is a common occurrence, often rooted in configuration or permission issues. Admins must check the calendar retention policy of Office 365 and align it with their industry standards before making any changes. Here are some prevalent issues and their solutions on a case-by-case basis:
Greyed Out or Missing Share Calendar Button:
Possible Cause: The absence of an organizational Exchange account or the admin disabling calendar sharing features within the network settings may lead to this issue.
Resolution: Ensure an Exchange account is still in use and not decommissioned. Moreover, check with the admin and ask them to enable calendar sharing for your account.
“This Calendar Can’t Be Shared” Error:
Possible Cause: An email address cannot be shared if it is incorrect, part of a group, already on a shared list, or from outside the organization.

Resolution: The email address should be within the organization and free of typos. Moreover, ensure it is an individual’s email address and not from a group. Also, check if the recipient is on the sharing list or not.
Calendar Permissions Not Updating:
Possible Cause: Outdated or duplicate entries in the Permissions list.
Resolution: Check for duplicate entries in the Calendar Properties dialog box. Remove users who left the organization or lacked permission. Some users have reported success in resetting permissions to default. If issues persist:
- Shut down the cached Exchange mode temporarily.
- Update Office to the latest version (in case you are using the on-premise version).
- Relaunch Outlook in safe mode using the command ‘outlook.exe /safe’.

For persistent issues, contact your IT support for assistance, as server-side problems may be the root cause.
Addressing these issues systematically can enhance the functionality of shared calendars in Outlook, providing a more seamless and collaborative user experience.
First Solution for Outlook Calendar Permissions Greyed Out Issue
One of the easiest ways to verify the problem is by logging into your Outlook Web Mail, and if you can see all appointments in the shared calendars online, then the issue is likely due to the cache on your Outlook needing refreshing. Here are the steps to fix the problem:
- Close all instances of Microsoft, like Outlook and Skype for Business, if they are running. (Use Task Manager)
- Then open File Explorer.
- In the address bar at the top, copy and paste the following path:
%USERPROFILE%\AppData\Local\Microsoft\Outlook or open the path if your location of Outlook is different. - Look for the Outlook Data File that corresponds to your email account, delete it, and close File Explorer.

- Open Outlook again and wait for Outlook to resync.
The Office 365 calendar permissions not updating problem will be resolved. If this method doesn’t work, then you can use this other method as well to resolve this error.
Second Solution to Office 365 Calendar Permissions Not Updating Error
- Open Microsoft Outlook
- In the toolbar, click on File, then Account Settings.
- Double-click on the Exchange Server Account you are using, which opens the Advanced tab.
- Unselect “Use Cached Exchange Mode”.
- Unselect “Download shared folders”.
- Click OK.
It automates calendar synchronization. Re-launch Outlook to fetch live data from the Exchange Server. This is another method through which you can get Office 365 calendar permissions not working in Outlook errors resolved.
Professional Solution to Outmaneuver Office 365 Calendar Permissions Not Updating Error
A way in which admins can recover the permissions is by changing the location of the calendar to the new account. In other words, they mustmigrate their Outlook calendar to Office 365instead. For this, they can go for the automated SysTools Office 365 Import tool. The tool is designed to move all calendar data with its pre-assigned permission to the new location.
Follow the steps below and get an alternative to resolving the Office 365 calendar permissions grayed-out error.
Step 1. Launch the tool, Select Outlook as the Source, and Office 365 as the destination.

Step 2. Scroll down to the Workload area and only mark the box next to calendars, then apply the date filter.

Step 3. On the Source screen, select the folder path where the files are located, then validate it.

Step 4. Similarly, on the Target Screen, perform the admin credential validation and hit Next.

Step 5. Select the method of user mapping from Fetch, Import, or Download as per your convenience.

Step 6. View the data, apply priority, and hit the Start Import button.

Conclusion
The errors, like Office 365 calendar permissions not updating or Office 365 calendar permissions greyed out, etc., occur in your account, which means that the admin has not permitted that particular user to access that calendar folder. Therefore, to use that folder, you need to contact the admin or export Office 365 Calendars to Outlook manually so that you may enable that calendar event in your Office 365 account.
Frequently Asked Questions
- Q. When I try out the first solution, I see that there are two different types of Outlook Data Files .ost and.nst. Which one do I delete?
You should delete the .ost file (Offline Outlook Data File) associated with your email account for main mailbox or shared calendar sync issues. The .nst file is for Microsoft 365 Groups. - Q. Will I lose any account data? Is deleting the .ost safe?
No, you won’t lose any data. For every Office 365, Exchange, and Outlook.com account, the actual data is on the server itself. This deletion won’t affect the main data. Rather, it allows Outlook to rebuild the local copy correctly. Fixing any shared calendar grey-outs simultaneously. - Q. If I start now, how long will it take to resync the entire data again?
It can happen with a few minutes or take several hours, all depends on how much data is in your email account.